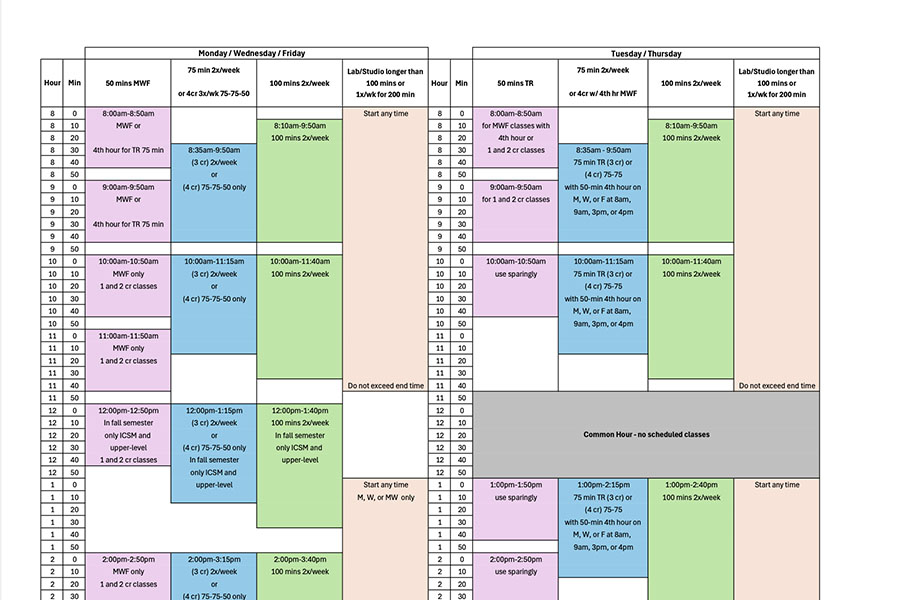
A Weird Imagination

Displaying Factorio history

Posted in

The problem#

Last week, I got all of the Factorio saves I had been keeping around into a single directory in order by the time they were created. But what should we do with that data? We could load arbitrary saves to see what our base looked like in the past, but loading the saves individually isn't a great way to do that when there's a lot of them.

The solution#

Luckily, I'm not the only one to want screenshots of my Factorio bases, so there are existing mods to do so.

The FactorioMaps Timelapse mod will take a list of saves and generates a web page like this demo that lets you look around your base across time. As the documentation explains, this is not actually a mod you enable for your save, but a script that you place in your mods/ directory that will run Factorio repeatedly to generate screenshots.

To set it up, use a non-Steam install of Factorio and put the saves you want under its saves directory (in a subdirectory named to_screenshot/ in this example). If you downloaded the mod as ZIP file (e.g., by installing the mod from within Factorio), unzip it; alternatively you can clone the GitHub repo or my fork which includes a few minor improvements for when displaying a lot of saves, especially ones less than an hour apart.

# get to Factorio install /mods/ directory
cd factorio/mods
# clone the git repo with the mod's internal name
git clone https://github.com/dperelman/FactorioMaps.git L0laapk3_FactorioMaps
cd L0laapk3_FactorioMaps
# install dependencies
python -m venv .venv
. .venv/bin/activate
pip install --upgrade -r requirements.txt
# add saves in /saves/to_screenshot/ to timelapse "mybase"
python auto.py --standalone mybase to_screenshot/*

Then you can find the timelapse in the directory script-output/FactorioMaps/mybase/ of your Factorio install; just open index.html in any web browser. Especially if you have a lot of saves, consider adding the --dayonly option to not take twice as much time also generating screenshots of the night view.

Generating screenshots as you play#

Note that if you just want to take screenshots automatically as you play, you can use the Screenshot Toolkit mod, which is what I use for single player games. But due to the way Factorio multiplayer works, doing so impacts every player, so in a multiplayer game it may be better to just copy the saves as the game runs and generate the screenshots later.

The details#

Read more…

Devlog: Folklife schedule user script (2 of 2): fighting React

Posted in

The problem#

Last time, I built a user script that could run on the Folklife 2024 schedule page1 and reorganize it so it would display the schedule as a grid. But it was brittle and awkward to use because it requiring careful ordering of the interactions with the page and reloading to view a different day's schedule.

The solution#

After failing to come up with an appropriate place to add an event handler, I gave up and took a different approach. I modified the script to work fine if it's run multiple times (and exit quickly if there's no work to do), even if the page is not in a valid state, and then simply set it to rerun every half second. Definitely a hack, but it worked.

Here's the final version of the user script and the Git repo showing the version history.

The details#

Read more…

Devlog: Folklife schedule user script (1 of 2): building the grid

Posted in

The problem#

The Folklife 2024 schedule page1 is a schedule grid: locations are along the x-axis and time is along the y-axis. Except it's not actually arranged as a grid: each column is just stacked in order with no correspondence to the other columns or the absolute times of the events. Glancing at the code, I noticed the schedule data was available in JSON format, so it should be pretty easy write a user script to display the schedule in a slightly different format.

But when I went to actually make the changes, I found the code is obfuscated React that turned out to be tricky to modify.

The solution#

I was able to write this user script (git repo), which changes the display from the columns of events to a schedule grid. It even works on Firefox mobile, although only if you explicitly request the desktop site.

The details#

Read more…

Monkey patching async functions in user scripts

The problem#

I was writing a user script where I wanted to be able to intercept the fetch() calls the web page made so my script could use the contents. I found a suggestion of simply reassigning window.fetch to my own function that internally called the real window.fetch while also doing whatever else I wanted. While it worked fine under Tampermonkey on Chromium, under Greasemonkey on Firefox, the script would just silently fail with no indication of why the code wasn't running.

(The script I was writing was this one for fixing the formatting on the Folklife 2024 schedule to reformat the schedule to display as a grid. I plan to write a devlog post on it in the future, but just writing about the most pernicious issue in this post.)

The solution#

The problem was that Firefox's security model special-cases function calls between web pages and extensions (and user scripts running inside Greasemonkey count as part of an extension for this purpose). And, furthermore, Promises can't pass the boundary, so you need to carefully define functions such that the implicit Promise created by declaring the function async lives on the right side of the boundary.

The following code combines all of that together to intercept fetch() on both Firefox and Chromium such that a userscript function intercept is called with the text of the response to every fetch():

const intercept = responseText => {
  // use responseText somehow ...
};

const w = window.wrappedJSObject;
if (w) {
  exportFunction(intercept, window,
                 { defineAs: "extIntercept" });
  w.eval("window.origFetch = window.fetch");

  w.eval(`window.fetch = ${async (...args) => {
    let [resource, config] = args;
    const response = await window.origFetch(resource,config);
    window.extIntercept(await response.clone().text())
    return response;
  }}`);
} else {
  const { fetch: origFetch } = window;

  window.fetch = async (...args) => {
    let [resource, config] = args;
    const response = await origFetch(resource, config);
    intercept(await response.clone().text());
    return response;
  };
}

The details#

Read more…

Deleting deeply nested OPFS directories

Posted in

The problem#

The straightforward OPFS API for deleting a directory

await parentDir.removeEntry(name, {recursive: true});

doesn't work if the directory contains too many (several hundred) levels of nested directories. The sensible workaround is never create such a directory structure and wipe the OPFS storage entirely if you ever do by accident, but as discussed previously, I did get in that situation due to a bug and wrote some helpers to deal with it.

The solution#

For any reasonable real-world case, what you actually want is probably removeEntry():

await parentDir.removeEntry(name, {recursive: true});

or to delete everything from the root directory:

const root = await navigator.storage.getDirectory();
for await (const handle of root.values()) {
  await root.removeEntry(handle.name, {recursive: true});
}

or possibly to simply use your browser's settings to delete all site data, which should include OPFS data.

In case you do still want to delete a directory in OPFS without worrying about how deeply nested the directory structure is, you can use

async function removeDirectoryFast(dir) {
  const toDelete = [];
  let i = 0;
  let maxDepth = 0;
  for await (const fileHandle
             of getFilesNonRecursively(dir)) {
    maxDepth = Math.max(maxDepth, fileHandle.depth);
    toDelete.push(fileHandle);
  }
  async function deleteAtDepth(depth) {
    for (const f of toDelete) {
      if (f.depth === depth) {
        await f.parentDir.removeEntry(f.name,
                            {recursive: true});
      }
    }
  }
  const increment = 500; // Works empirically in Firefox.
  for (let depth = maxDepth; depth > 1; depth -= increment) {
    await deleteAtDepth(depth);
  }
  await deleteAtDepth(1);
}

This depends on the getFilesNonRecursively() helper from my previous blog post.

The details#

Read more…

Debugging OPFS

The problem#

While the web developer tools in Firefox and Chrome provide a Storage/Application tab for inspecting the local data stored by a web app, neither shows OPFS files there, making it difficult to tell what's going wrong when you have a bug (which was a problem when writting my recent blog posts about OPFS). There's open Firefox and Chromium bugs about the missing feature, so if it's been a while since this was posted when you're reading this, hopefully this is no longer a problem.

Additionally, the tools I did find all use recursion, resulting in them failing to work on the deeply nested directory tree I created by accident.

The solution#

If you don't have several hundred levels deep of nested directories, you can just use this Chrome extension or this script (or probably this web component, although I couldn't get it to install), all named "opfs-explorer".

The following AsyncIterator returns all of the files in OPFS without using recursion and adds properties to include their full path and parent directory:

async function* getFilesNonRecursively(dir) {
  const stack = [[dir, "", undefined, 0]];
  while (stack.length) {
    const [current, prefix, parentDir] = stack.pop();
    current.relativePath = prefix + current.name;
    current.parentDir = parentDir;
    current.depth = depth;
    yield current;

    if (current.kind === "directory") {
      for await (const handle of current.values()) {
        stack.push([handle,
                    prefix + current.name + "/",
                    current,
                    depth + 1]);
      }
    }
  }
}

And here's the simple HTML display function I've been using that calls that (you will likely want to modify this to your preferences):

async function displayOPFSFileList() {
  const existing = document.getElementById("opfs-file-list");
  const l = document.createElement('ol');
  l.id = "opfs-file-list";
  if (existing) existing.replaceWith(l);
  else document.body.appendChild(l);

  const root = await navigator.storage.getDirectory();
  for await (const fileHandle
             of getFilesNonRecursively(root)) {
    const i = document.createElement("li");
    i.innerText = fileHandle.kind + ": "
                  + (fileHandle.relativePath ?? "(root)");
    if (fileHandle.kind === "file") {
      const content = await fileHandle.getFile();
      const contentStr = content.type.length === 0
                      || content.type.startsWith("text/")
        ? ("\"" + (await content.slice(0, 100).text()).trim()
          + "\"")
        : content.type;
      i.innerText += ": (" + content.size + " bytes) "
                     + contentStr;
    }
    l.appendChild(i);
  }
}

The details#

Read more…

Loading multiple files without ZIP

The problem#

Last time, I showed how you can let a user have control over their data stored in a web app's OPFS by transferring directories in or out of the browser as ZIP files. But it would be more convenient if the user could just transfer folders instead without needing the extra step of going through an archive manager. There's no shortcut for getting data out of the browser: we can only save one file at a time (unless we use the Chrome-only File System Access API). But there is a cross-browser way to load multiple files, or even nested directories, into the browser.

The solution#

The HTML Drag and Drop API supports transferring multiple files and directories, although the details are a bit messy:

const target = document.getElementById("dropTarget");
// Required to make drop work.
target.addEventListener("dragover", (e) => e.preventDefault());
target.addEventListener("drop", async (e) => {
  e.preventDefault();
  await Promise.allSettled([...e.dataTransfer.items]
    .map(async (item) => {
      if (item.getAsFileSystemHandle) {
        await processFileSystemHandle(dir,
          await item.getAsFileSystemHandle());
      } else {
        await processFileSystemEntry(dir,
          item.webkitGetAsEntry());
      }
    })
  );
});

As you can see, for cross-browser support, we need to handle both getAsFileSystemHandle() and webkitGetAsEntry(). And, unfortunately, they return different types, so those two process*() functions really are pretty different:

async function processFileSystemHandle(dir, handle) {
  if (handle.kind === "directory") {
    const subdir = await dir.getDirectoryHandle(handle.name,
                             {create: true});
    for await (const entry of handle.values()) {
      await processFileSystemHandle(subdir, entry);
    }
  } else /* handle.kind === "file" */ {
    await writeFile(await dir.getFileHandle(handle.name,
                              {create: true}),
                    await handle.getFile());
  }
}
async function processFileSystemEntry(dir, entry) {
  async function readDirectory(directory) {
    let dirReader = directory.createReader();
    let getEntries = async () => {
      const results = await (new Promise((resolve, reject) =>
        dirReader.readEntries(resolve, reject)));
      if (results.length) {
        return [...results, ...await getEntries()];
      }
      return [];
    };

    return await getEntries();
  }

  if (entry.isDirectory) {
    const subdir = await dir.getDirectoryHandle(entry.name,
                             {create: true});
    for (const el of await readDirectory(entry)) {
      await processFileSystemEntry(subdir, el);
    }
  } else /* entry.isFile */ {
    const file = new Promise((resolve, reject) =>
      entry.file(resolve, reject));
    await writeFile(await dir.getFileHandle(entry.name,
                              {create: true}),
                    await file);
  }
}

(These assume the writeFile() helper from last week's post to handle writing inside a Web Worker as necessary.)

The details#

Read more…

ZIP web app local data

The problem#

In my previous post, I gave some tips for making a web app save and load its data as a file to give the user control over their data. But for many applications, it's useful to think of the user's data as multiple files, possibly organized into directories. OPFS lets a web app store local data with a filesystem-like API, but, due to security concerns, there's no direct access to the user's real filesystem, so there's no straightforward way for the user to view or manipulate that data.

The solution#

The common way to deal with this kind of issue is to stuff all of the files into one file, reducing it to a solved problem. We'll use the ZIP archive file format as it's pretty universally supported, so the user can likely use such files. In these examples, I use the zip.js library, so you'll have to import zip-fs.min.js (or equivalent) to use them.

In these functions, dir is an OPFS directory: either the root directory from navigator.storage.getDirectory() or a subdirectory's FileSystemDirectoryHandle. They input/output the ZIP files as Blobs; use the helpers from my previous post to actually connect to the user's filesystem.

Downloading a directory as a ZIP is simple:

async function zipDirectory(dir) {
  const zipFs = new zip.fs.FS();
  await zipFs.root.addFileSystemHandle(dir);
  return await zipFs.exportBlob();
}

Reading a ZIP file into OPFS is more complicated and must be done inside a Web Worker (due to using createSyncAccessHandle()):

async function unzipToDirectory(zipfile, dir) {
  const z = new zip.fs.FS();
  await z.importBlob(zipfile);

  async function extract(z, dir) {
    if (z.directory) {
      const childDir = z.name
        ? await dir.getDirectoryHandle(z.name,
                    { create: true })
        : dir;
      for (const child of z.children) {
        await extract(child, childDir);
      }
    } else {
      await writeFile(
        await dir.getFileHandle(z.name, { create: true }),
        await (await z.getBlob()).arrayBuffer());
    }
  }

  await extract(z.root, dir);
}
async function writeFile(file, contents) {
  const handle = await file.createSyncAccessHandle();
  handle.truncate(0);
  if (contents.arrayBuffer) contents = await contents.arrayBuffer();
  handle.write(contents);
  handle.flush();
  handle.close();
}

The details#

Read more…

Keeping web app data local

The problem#

Users don't tend to have a lot of control over their data in web apps. Most often, the data is stored on a server the user does not control—or, if they do control it, we're talking about self-hosting which is much more involved then just navigating to a web app in a browser. Alternatively, the data may be stored locally, but using various browser-specific mechanisms which make it difficult for the user to share, backup, or otherwise reason about the data the web app manipulates.

While desktop apps can replicate these problems, usually they store data in files either explicitly chosen by the user or in well-known locations.

The solution#

Files are a flexible interface to let users do whatever they want with their data, so let's use them for web apps, too.

To save a file to the user's computer, modified from this example:

function saveFile(filename, data, mimeType) {
  const element = document.createElement("a");
  const url = URL.createObjectURL(new Blob([data],
                                  { type: mimeType }));
  element.setAttribute("href", url);
  element.setAttribute("download", filename);
  element.click();
  URL.revokeObjectURL(url);
}
// Save a JSON file:
saveFile("hello.json",
  JSON.stringify({"Hello": "World!"}, null, 2),
  "application/json");

(Consider using beforeunload if the user has unsaved changes to make sure they really do have their data in the file, and not just in the browser.)

To load a file from the user's computer:

function loadFile() {
  const element = document.createElement("input");
  element.type = "file";
  return new Promise((resolve, reject) => {
    element.click();
    element.addEventListener("change",
      () => resolve(element.files[0]));
    element.addEventListener("cancel",
      () => reject("User canceled."));
  });
}
// loadFile() must be called from a real user click.
myButton.addEventListener('click',
  async (e) => myLoadFunc(await loadFile()));

The details#

Read more…

Serverless WebRTC

The problem#

While in my last post, I said serverless WebRTC was too cumbersome, I wanted to try to see how streamlined I could make the process. While researching, I did find a variant of serverless-webrtc called serverless-webrtc-qrcode as well as a similar demo, webrtc-qr that both use QR codes as an easy way to transmit the offer strings. But both require that both sides have a camera to scan QR codes, while my use case is a WebRTC connection between my desktop without a camera and my smartphone.

The solution#

minimal-webrtc now has a checkbox to enable serverless mode. In that mode, the QR code shown by the host is a much longer URL that includes the initial WebRTC offer. Opening that URL on another device (or in another browser window) will show another QR code along with a "Copy" button. With the first device, either press the "Scan QR code" button and point it at the QR code or use some other mechanism to copy the text and paste it into the text area labeled "Paste offer here:".

To run it locally, download the source code and run a web server to serve the wwwroot/ directory. If both devices can run a web server, then you can just access it via localhost on each, but, as before, because WebRTC requires HTTPS, to run it on your local network, you may need to set up a self-signed certificate.

The details#

Read more…